Exploring an Alternative Method for Operating the Nordic nRF52 Chipset with Arad Connectivity MN52 Series Module
[TAIWAN, 17th Dec. 2024]
Introduction
The Nordic nRF52 series is a powerful and versatile family of microcontrollers designed for Bluetooth Low Energy (BLE) and other wireless applications. Combining the ease of use of the Arduino platform with the advanced capabilities of the nRF52 chip opens up a wide range of possibilities for developers and hobbyists alike. This guide will walk you through the process of setting up and programming the nRF52 chip using the Arduino IDE, enabling you to leverage its features for your next IoT project. Whether you're looking to create a simple BLE beacon or a complex wireless sensor network, this introduction will provide the foundational knowledge you need to get started.

Step 1: Installing Arduino IDE (integrated development environment) on a Windows 11 computer
1.1 To install Arduino IDE, the following walk-through video we can refer to:
https://www.youtube.com/watch?v=qRkQzBWmLkc
1.2 The Arduino IDE package is available on the website.
https://support.arduino.cc/hc/en-us/articles/360019833020-Download-and-install-Arduino-IDE


Step 2: Flashing Arduino bootloader to EVB MN52H-C40
To create an Arduino environment on MN52H-C40 first is to flash an Arduino bootloader. The operation is as follows:

2.1 Download Nordic nRF Connect for Desktop from the Nordic official website below and install.
https://www.nordicsemi.com/Products/Development-tools/nrf-connect-for-desktop/download
2.2 Introduction to Using Nordic: nRF Connect for Desktop: Programmer
For an introduction and tutorial on using Nordic: nRF Connect for Desktop: Programmer, please refer to the following link:
https://www.youtube.com/watch?v=TeBvb645NZA&t=151s
2.3 Download Arduino boot-loader
The boot-loader can be found at GitHub an open-source website. The link is below:


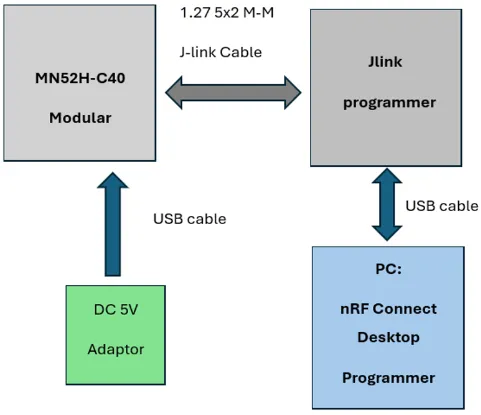
2.4 Hardware Setup
2.4.1 Hardware Setting Chart
2.4.2 Cable Layout

2.5 Flash Arduino boot-loader
2.5.1 Run nRF Connect for Desktop
2.5.2 Click on “Programmer” open icon
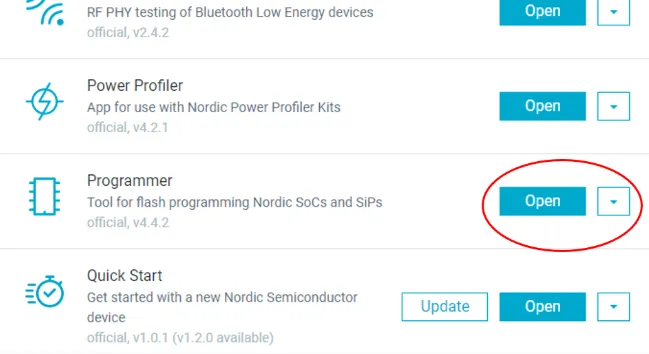
The operating page of the Programmer

2.5.3 Click on “SELECT DEVICE”

2.5.4 Select “J-Link”

2.5.5 Loading file “adm_b_nrf52840_1_bootloader-0.9.2_s140_6.1.1.hex”

2.5.6 Click on “Erase & write”

2.5.7 Check if the flash process is completed successfully
Successful message as above showing:
“…Reading readback protection status for Application core completed”

Congratulations! You can now start developing the Arad Connectivity MN52H-C40 EVB using the Arduino IDE!
Edited by Intl. Commercial Development Manager: Mr. Tim Chien
Technical guidance provided by R&D Manager: Mr. Venson Laio